Stone Age Fitness
For Christmas in my family, we pull names out of a hat and give one present to one person. My brother Pat got me back in December, and he suggested maybe he could come out here from Chicago and help with a project.
Yesterday, we started that project — building a rock wall and path for a garden bed on the steep hillside outside my house in Mill Valley. We were stiff and tired last night — maybe the beers contributed to that — but what a great present. Other than the expense of buying the rocks and gravel and stepping stones, I would do this again in a second.
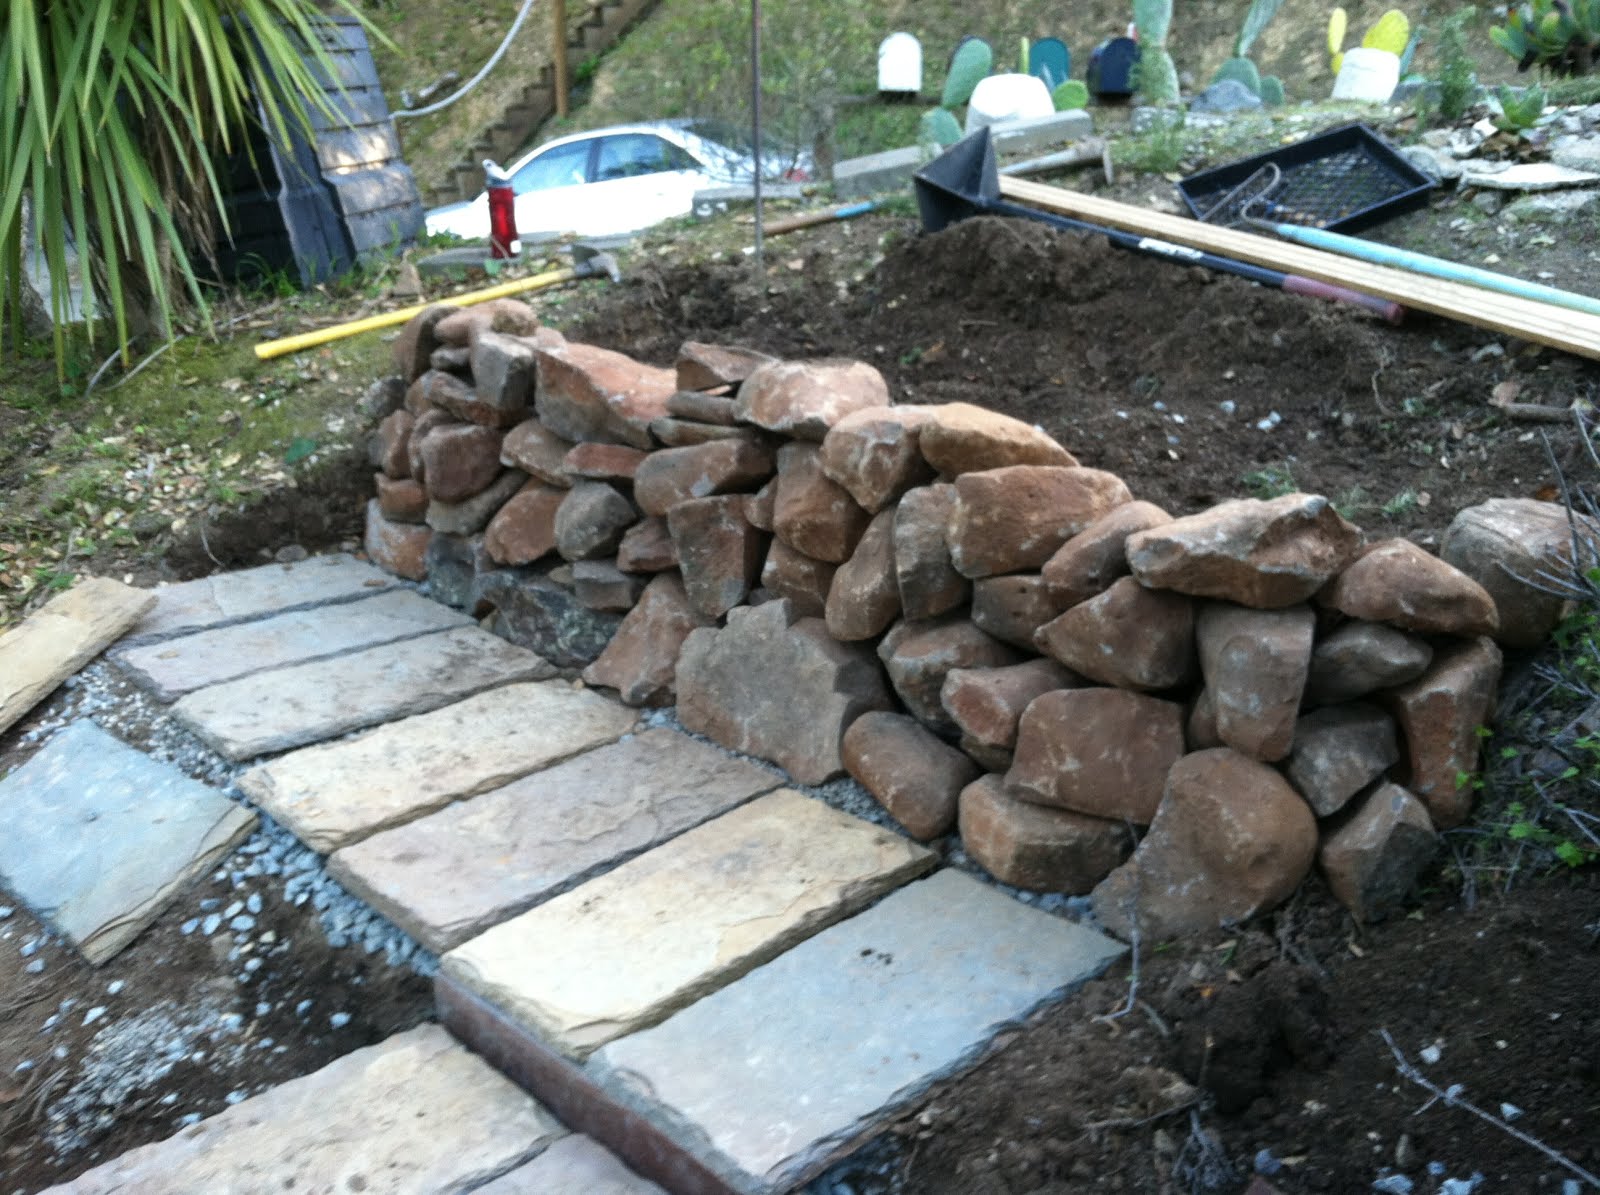
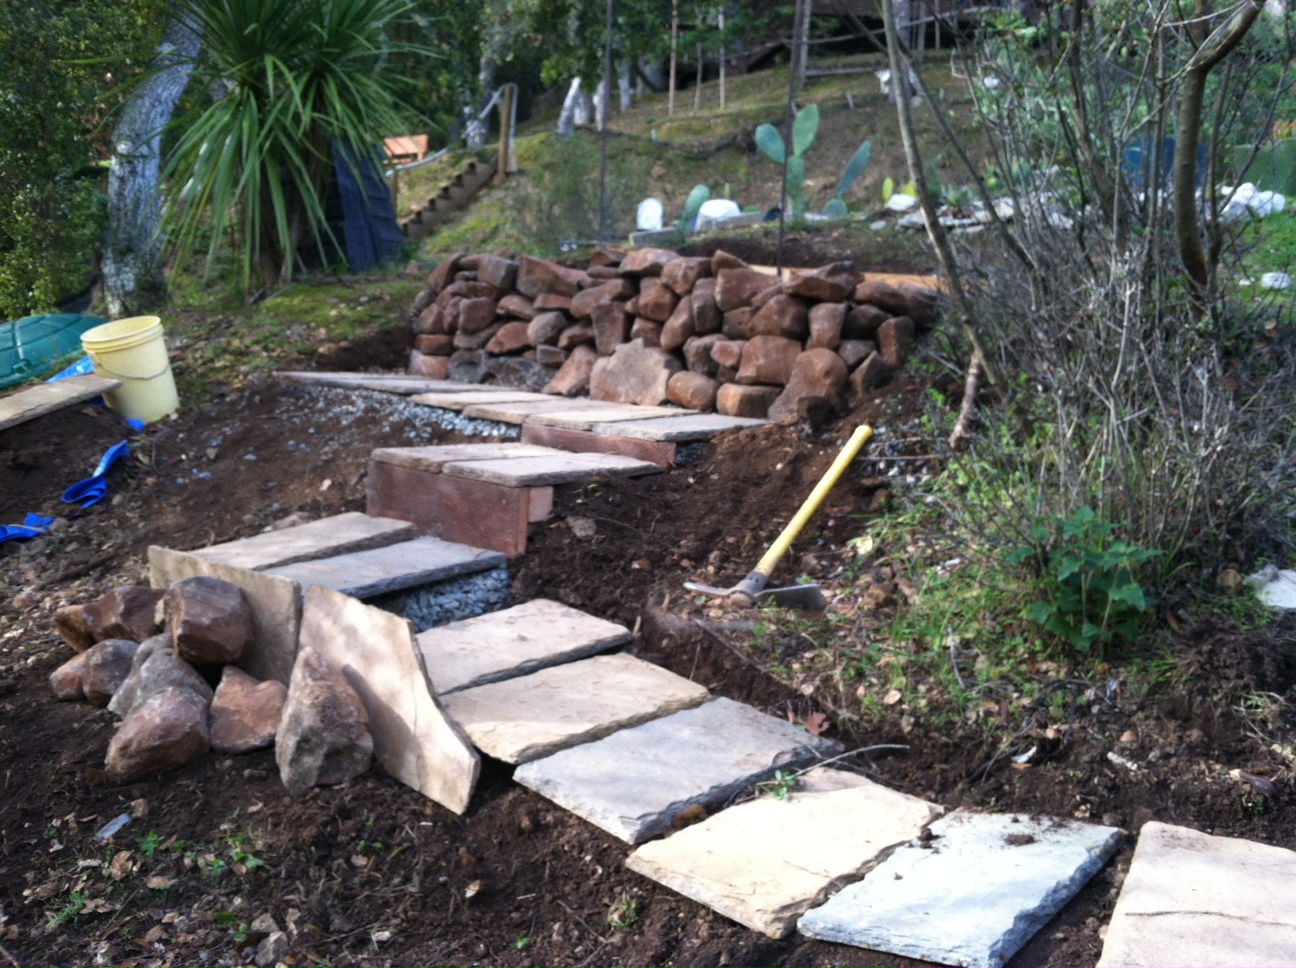
Good thing, because after breakfast, we go at it again. We made excellent progress on our first day, more than I expected, but we’re not done yet. The rock wall is complete (and there are enough rocks left to build another one) and eight of the stepping stones are laid, but we have another dozen or so to go. Plus we had a little mission creep and now we’re also going to redo some of the existing steps down the hillside, which have been an accident waiting to happen.
Here’s what it looks like so far. Not bad for a couple of middle-aged men who sit in front of screens most days.
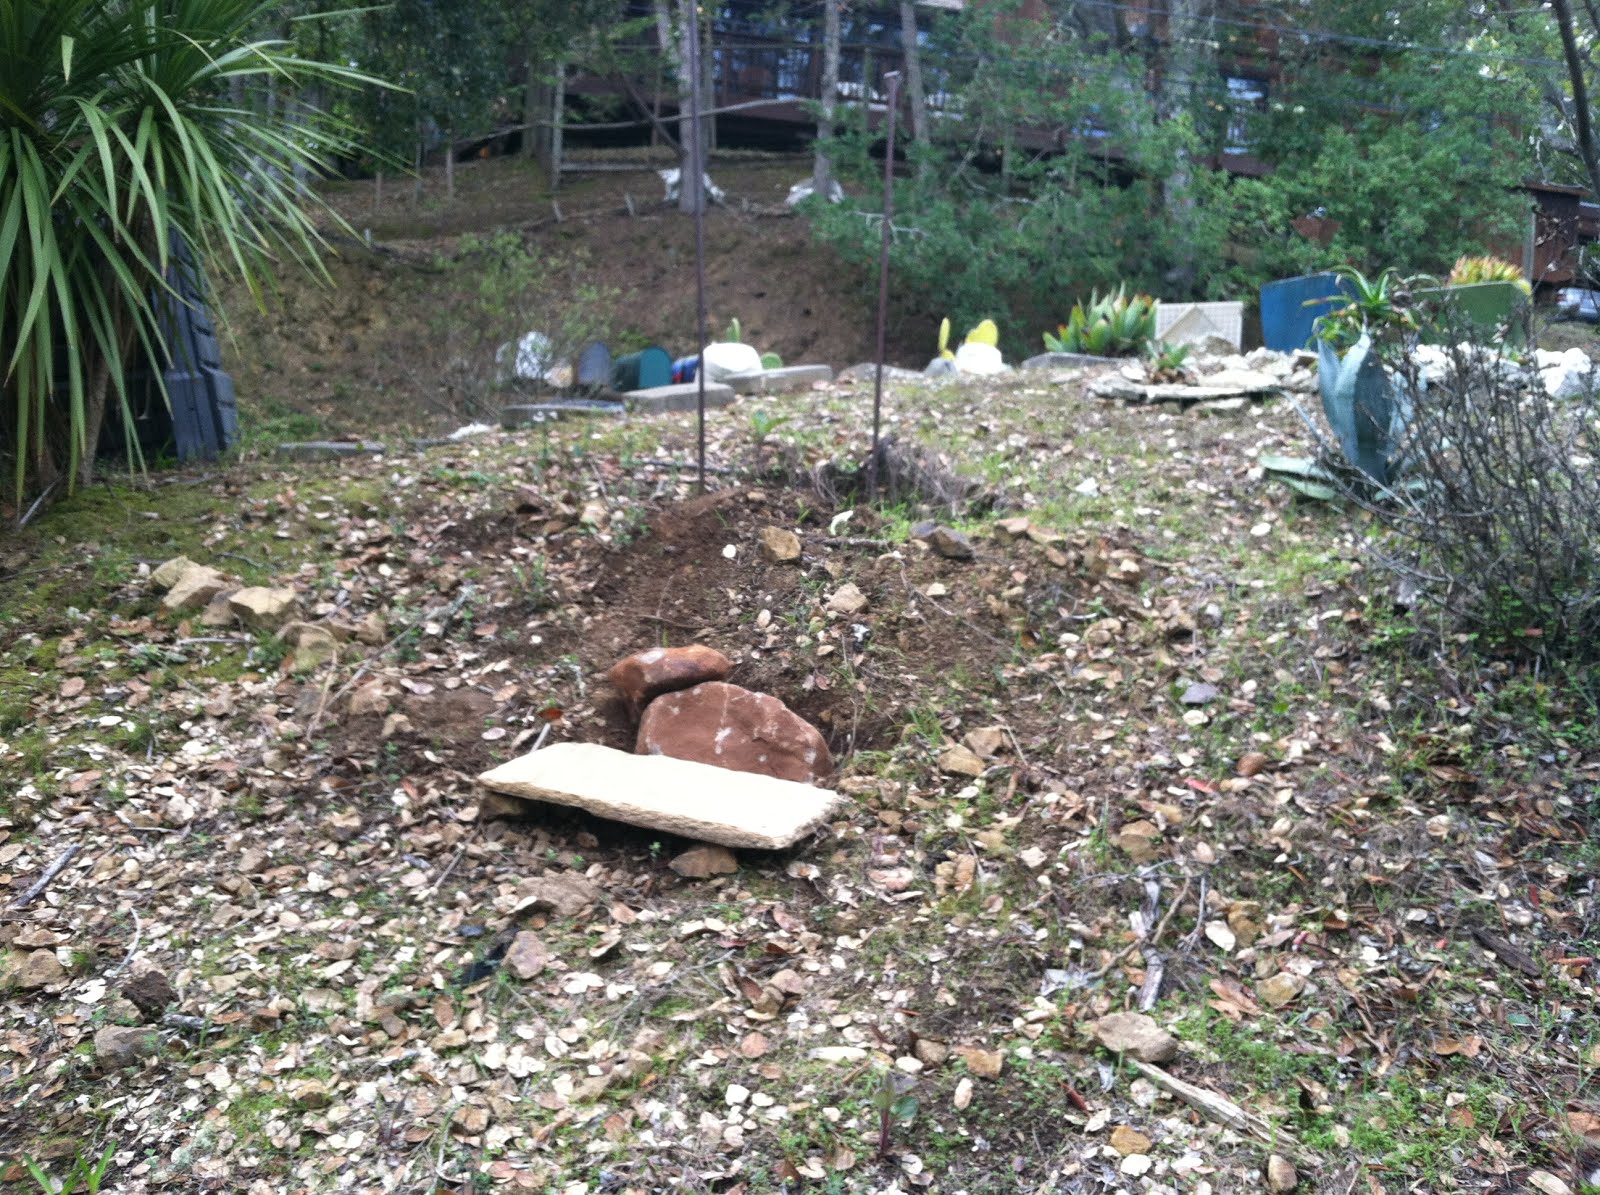
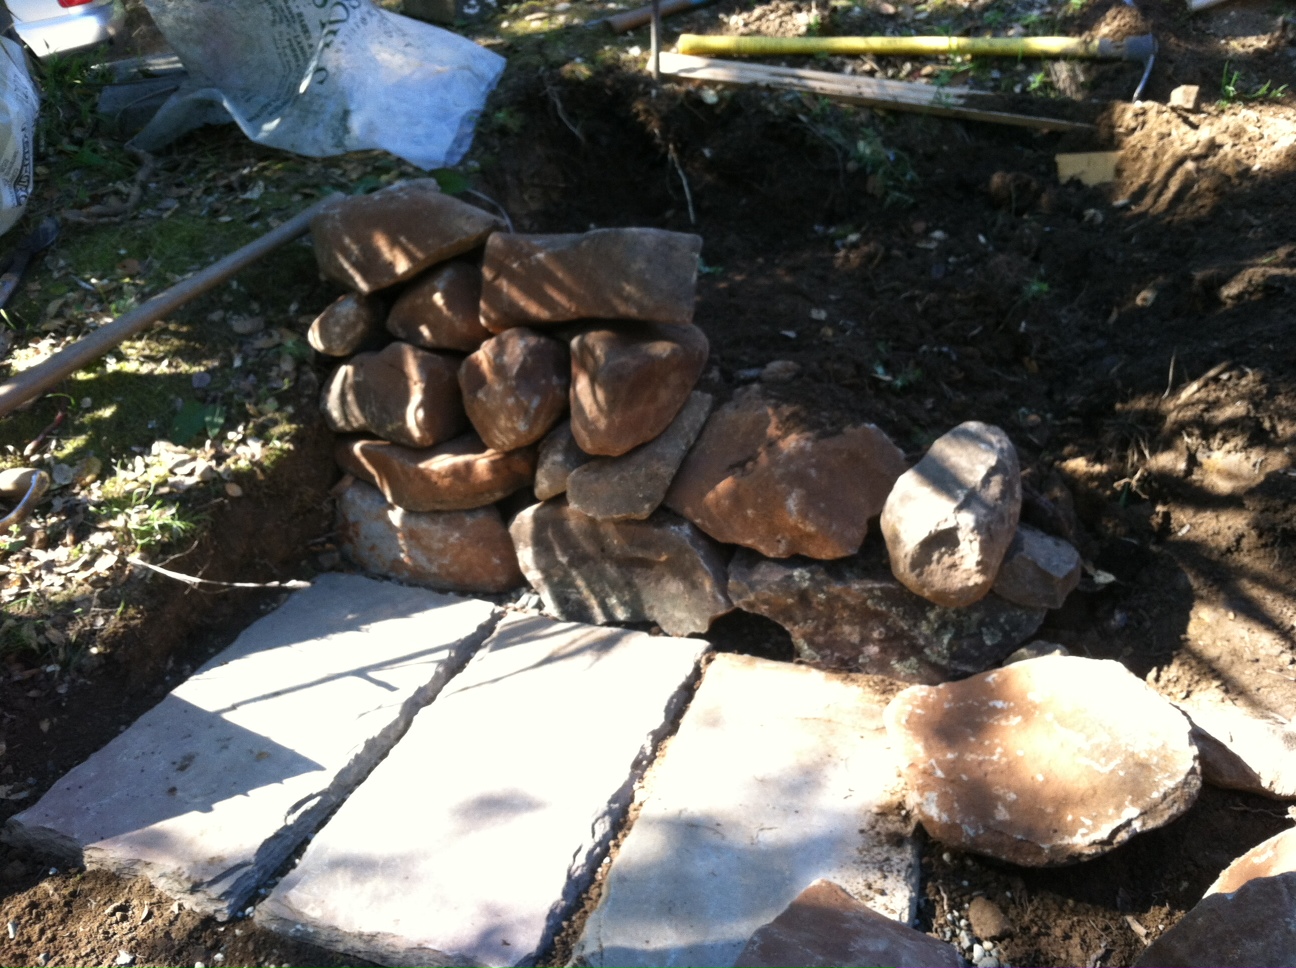
Here’s the before photo, with a couple sample rocks.
When we selected the rocks, Sonoma fieldstone, the most local and the least expensive, we learned that there are two main sizes, heads and double heads. The double heads were pretty heavy, but we didn’t need many of them. Those were for the bottom row, to create a strong, stable foundation.
—
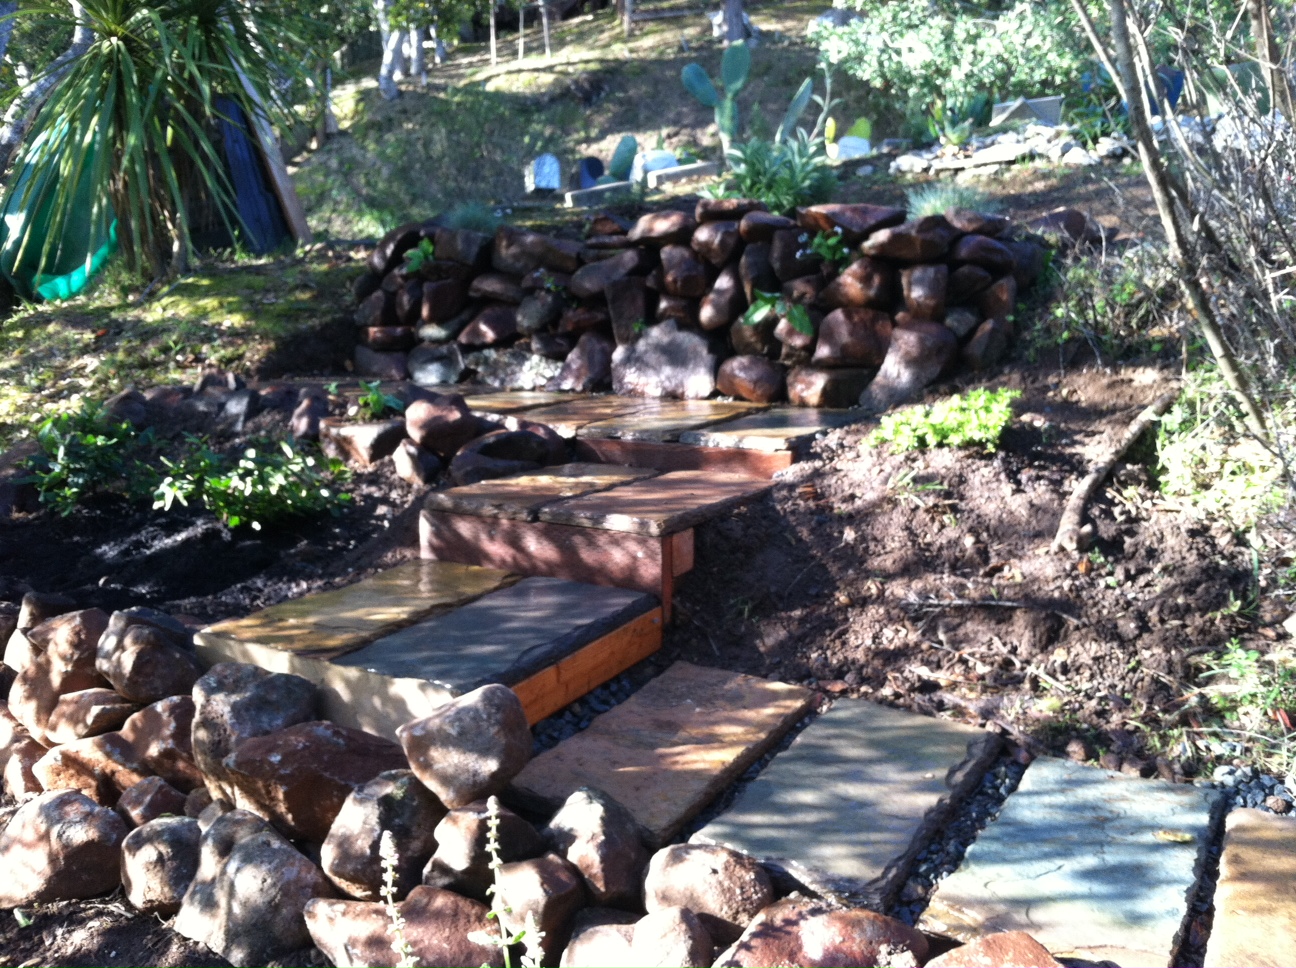
It’s Saturday morning. We’re already done. We alloted ourselves three days and finished it in two, even with the mission creep. (Here’s to setting modest goals.) We even did some planting. Here’s a view from above. It already looks good, but will be even better as the plants grow.

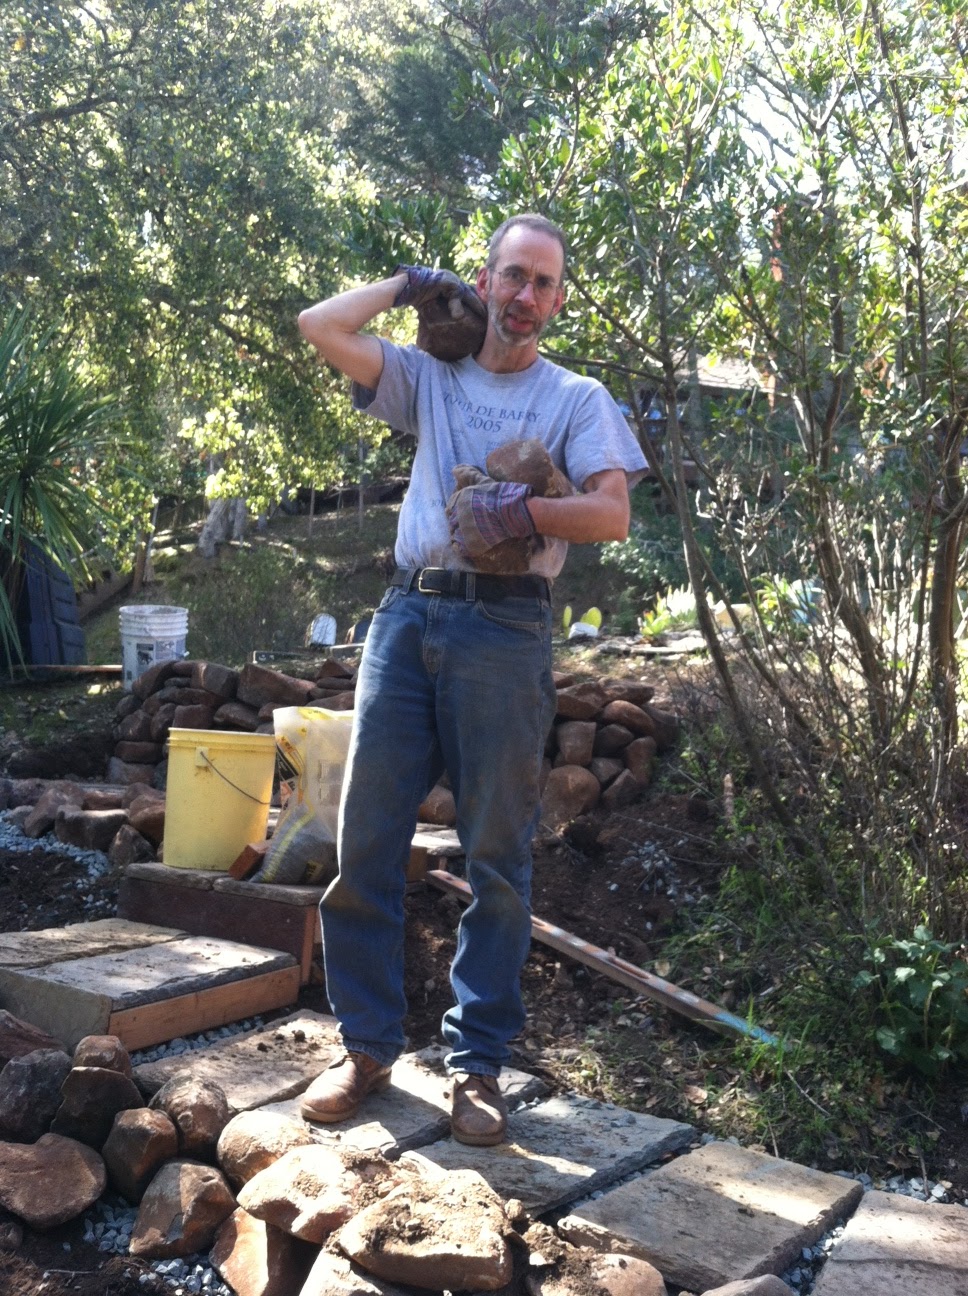
We also came up with a new startup idea: Stone Age Fitness. You pay us to be your personal trainers, and we put you to work carrying rocks down steep hillsides. Here’s Pat posing for our promo.
Here’s how we did it:
Minimal Planning, Mostly Improvisation: My plan had been to sketch out the wall and garden using my rudimentary landscape design skills. I did map out my yard in Berkeley, years ago, but it was a flat rectangle. Easy to measure. This is a curved corner lot on a steep hillside. I took a number of measurements, but never did more than the most cursory sketch. (Enough to show it to José at American Soil Products where we bought the stones, so he could help us estimate how many we needed.) More important than the sketches was reading up on some web sites and landscape design books.
What we built is called a “dry-stone retaining wall,” with no mortar to hold the stones together. The Incas built huge walls and agricultural terraces using these methods 600+ years ago. Similar walls from centuries ago have been found in Ireland, Scotland, Zimbabwe, China, and many other places. To prepare fields for planting, farmers had to remove rocks from the soil, so they were right there at hand, ready to be used for any needed structures.
Please note: This is not a how-to. We’ve never done this before. We don’t know if the rock wall will come tumbling down in a downpour, will fall over when some deer kicks it. I know more than I did a week ago — that’s as much as I can promise.
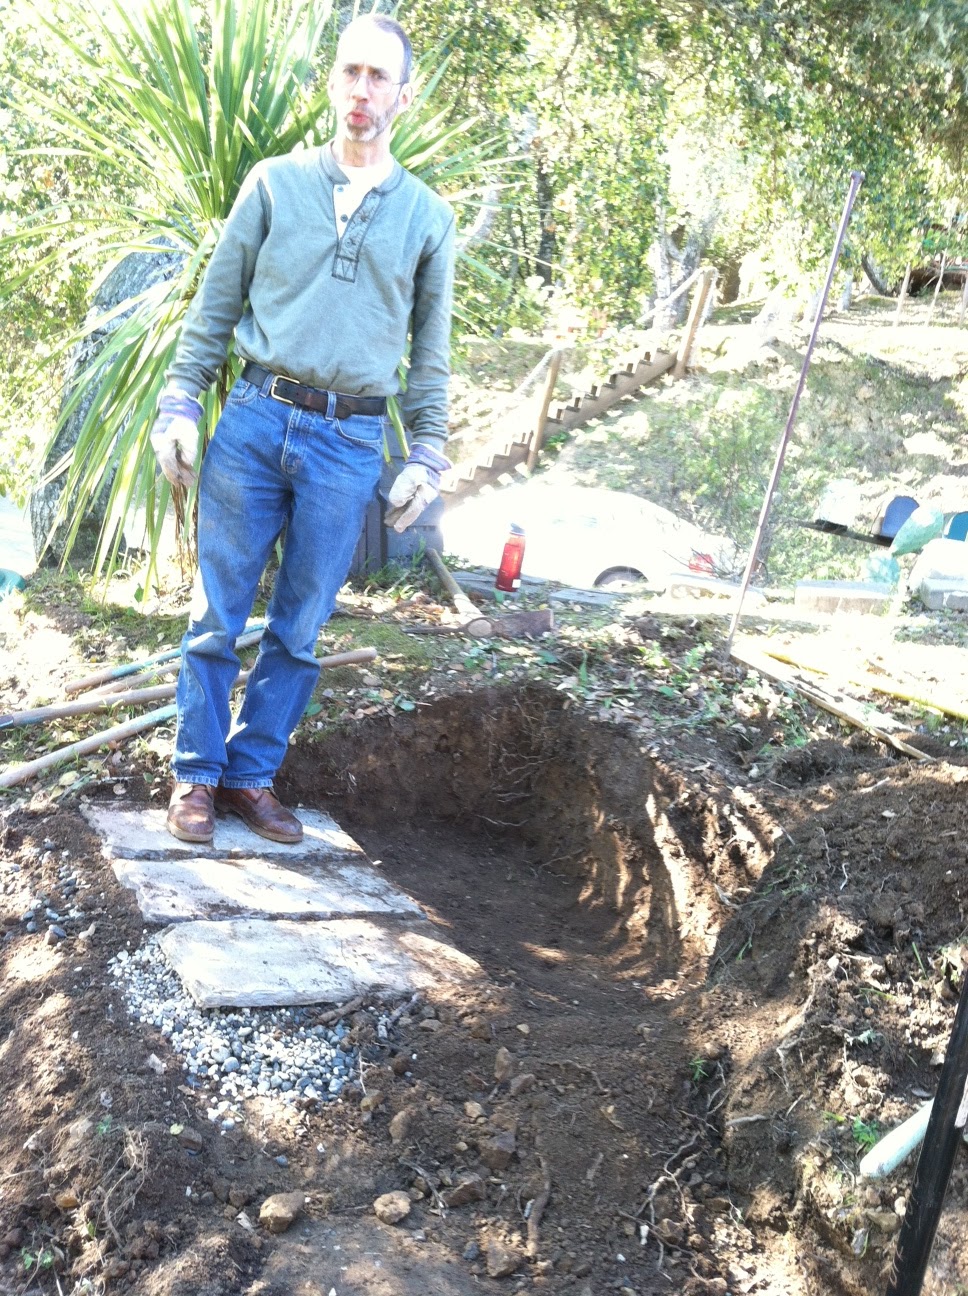
What I did do that served as a starting point was approximate where the walls and pathway would be with hoses and stakes. After walking around our worksite, we made some adjustments to these boundaries and started digging.
Fortunately, we had some heavy rains in February and the ground was soft and easy to dig. We piled the dirt on a tarp we spread out on the hillside, with an old plastic turtle sandbox on top to serve as a backstop and prevent the dirt from sliding down the hill.
The Flat Earth Society: For the rock wall and steps to be stable, we needed first to create a level surface. We cut into the hillside with picks and shovels and then, using a tamper from the Berkeley Tool Lending Library — Yay Berkeley — created a strip about three to four feet wide. Then we poured gravel on that strip and tamped it again. That was wide enough for both the foundation of the wall and the flagstone steps in front of it.
The original specs were for one rock wall about a foot deep, two feet high, and six to eight feet long, leaning into the hillside, holding a garden bed about four feet deep. Almost as important was a level pathway in front of the garden and connected to the steep steps along the side of the house. The hillside is steep enough that it’s a challenge to find any spot where you can stand with both feet at the same level. On the morning we started the job, we got two pallets delivered to our driveway with 1.5 tons of Sonoma fieldstone, 15 rustic green rectangular flagstones, each 1 foot by 2, and four bags of gravel, nowhere close to how many we needed.
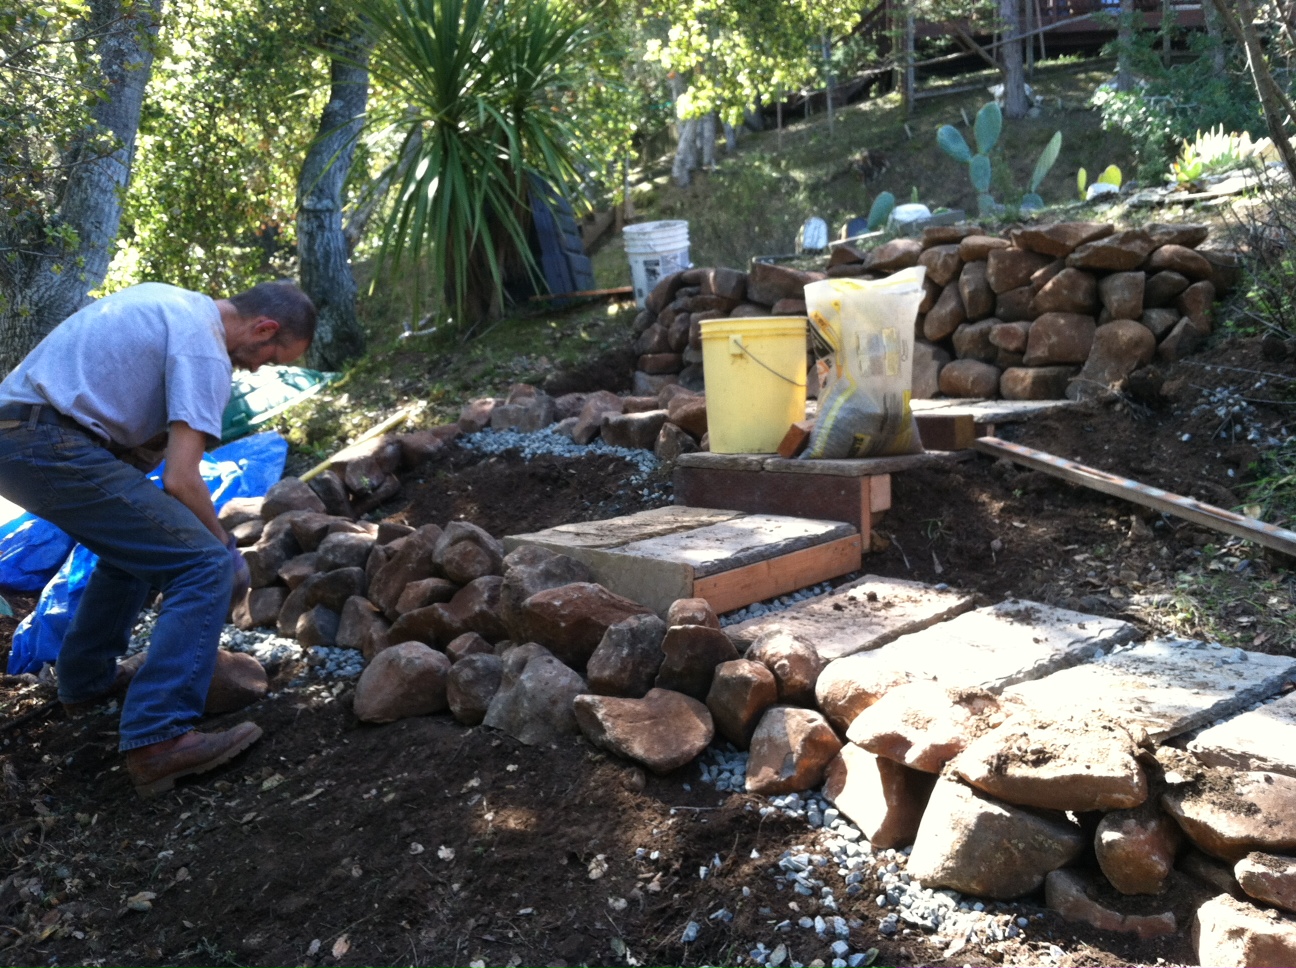
We laid the flagstone steps first, because then we could stand on them while we built the wall, which went up surprisingly fast. We did have to lug a lot of rocks thirty feet or so down these steep treacherous steps from the driveway to the worksite. Below you can see Pat standing on the first three steps we laid and the cut we made into the hillside. The next shot shows the beginning of the wall.
We angled the wall ever so slightly in toward the hillside, and when we reached about a foot high, we filled behind it with lots of gravel (for drainage) and some of the dirt we had dug out earlier. The stacking of the rocks was like putting together a puzzle. At first, I was looking for specific shapes, then I found it made more sense to just pick one or two rocks and then find the best spot for them on the wall. We did our best to overlap one double head on top of two heads, the way a brickmason would overlap bricks.
We completed most of the rock wall and six of the flagstone steps by midday and then we had to go out and buy some more gravel, flagstone steps, and lumber.
Overbuilding: My brother and I have both done a lot of work around our houses for years, but he’s more experienced and skilled at construction, and he suggested we get some pressure treated 4 x 4s and 2 x 8s to create frames for the stepping stones as they descended the hill. (My original thought was to do without, but he argued, correctly, that we wanted this to last through heavy rains, and we should err on the side of overbuilding. So we did.)
You can see below, just to the left of the yellow pick, the way the lumber framing allows us to move down the hills and keep the flagstones level.
As I said, we had more rocks than we needed for one wall, so we built additional ones, to create another planting area, but mostly to give more support on the downhill side of the flagstones. So a hard rain wouldn’t wash out the gravel and dirt underneath them.
Natives, Not Vegetables: My original thought was to grow greens in the bed — chard, kale, lettuce, spinach, and so on. (Not enough sun or heat to grow tomatoes.) I knew that because of the deer, we would need to build some sort of cage to cover the bed. I did more sketches of that than the rock wall itself.
I’m a newcomer to this hillside home. My wife has lived here for more than 20 years, I’ve been here less than one. She likes the natural oak woodland look and I promised that the garden bed project would be in keeping with the natural surroundings. Certainly the rock wall seems very organic. If we dug deep enough, we’d probably find rocks just like the ones we piled into a wall.
But a cage over the bed? That could be ugly. So we decided instead for native perennials that were deer-resistant, and went down Friday afternoon to the native plant nursery at Tam Junction and picked up two coffeeberry bushes, three sages, and several grasses and groundcovers.
Here’s our planted garden from below. Pretty great, huh? While these are native plants, they may take a year or more to get fully established. Especially given the drought. But once they do, well, they’ll act as if they belong here.
(John Byrne Barry is author of Bones in the Wash: Politics is Tough. Family is Tougher.)
Recent Comments